Amplitude split with REAPER 7 FX Containers
Can we use REAPERs routing capabilities to split a signal by amplitude? Yes we can! In fact, REAPER 7s new FX Containers make this even more convenient. This is a transient shaper on steroids!
Why split a signal by amplitude?
Separately manipulating the transient and the sustained section of an audio signal is really popular. SplitEQ and new features in Ozone 11 are two well known examples.
Imagine a threshold dividing your signal into loud and quiet sections, here marked as “high” and “low” amplitude regions:
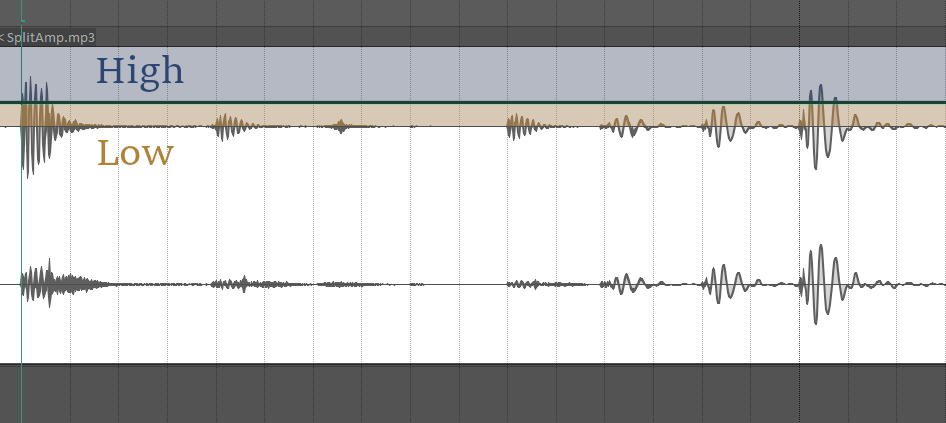
Amplitude Threshold
During mixing, it is more common to make slight adjustments and compressors really are the most popular tool to adjust the volume between loud and quiet sections of a signal. Shaping the transient is just one of the many possible applications of a compressor.
But wouldn’t it be fun to be able to throw any FX on either the loud or the quiet sections of a signal? This feels like a strong sound design workflow to me! Let’s see, if we can use REAPERs routing capabilities to map such a workflow to an FX chain.
What’s the setup?
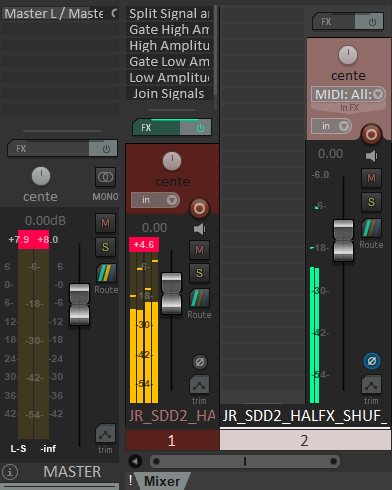
This FX chain contains all elements we need:
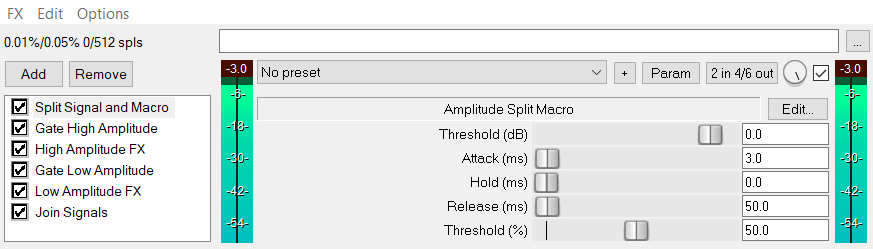
Amplitude split FX chain
- The “Amplitude Split Macro”, described below, is a small JS dummy that just provides slider to precisely configure multiple other FX at the same time
- Two instances of ReaGate divide the signal into the high and low amplitude parts. Their attack, hold, release and threshold parameters should be exactly the same
- Each ReaGate is follow with an FX Container, collecting all FX that apply to the high and low amplitude regions, respectively
- A simple 2 band joiner mixes both parts to a stereo signal again
The Amplitude Split Macro and 2-Band Joiner
Since both ReaGate instances should have the same configuration, I wrote a simple JS script that only contains a couple of sliders, mirroring the corresponding ReaGate parameters. The sliders have the correct range, such that it stays true to the units (dB, ms, etc.) in ReaGate. Additionally, we scale the Threshold to a 0 to 100% range, which is a helper variable, working around an issue described below.
desc:Amplitude Split Macro

slider1:0<-60,6,.1>Threshold (dB)
slider2:3<0,500,1>Attack (ms)
slider3:10<0,1000,1>Hold (ms)
slider4:50<0,5000,1>Release (ms)
// map ReaGate Threshold to this!
slider5:0<0,100,.1>Threshold (%)

in_pin:low input left
in_pin:low input right
out_pin:high left output
out_pin:high right output
out_pin:low left output
out_pin:low right output
out_pin:orig left output
out_pin:orig right output

@slider
scaletodB = 8.689;
// map dB scale to 0 to 100
slider5=exp(slider1/scaletodB)*50;

@sample
spl0 = spl0;
spl1 = spl1;
spl2 = spl0;
spl3 = spl1;
spl4 = spl0;
spl5 = spl1;
You can download the JS script or just create a file with the above content yourself.
Install it like any other JSFX, e.g. by placing it in REAPER7\Effects\jorchime\, if you have a portable REAPER installation.
To join the signals in the end, you can use the default 3-band joiner, or a dedicated 2-band joiner with a dry/wet mix, between the original and both split signals:
desc:2-Band Joiner

slider1:0<-60,6,.1>High (dB)
slider2:0<-60,6,.1>Low (dB)
slider3:100<0,100,1>Dry/Wet (%)

in_pin:high input left
in_pin:high input right
in_pin:low input left
in_pin:low input right
in_pin:orig input left
in_pin:orig input right
out_pin:left output
out_pin:right output

@init
c_ampdB = 8.65617025;

@slider
band1 = exp(slider1/c_ampdB);
band2 = exp(slider2/c_ampdB);
band3 = slider3/100.0;
invband3 = 1-band3

@sample
spl0 = spl0 * band1 * band3 + spl2 * band2 * band3 + spl4 * invband3;
spl1 = spl1 * band1 * band3 + spl3 * band2 * band3 + spl5 * invband3;
Configuring the ReaGates
For both ReaGate instances, you need to use REAPERs “parameter link” feature to link the threshold, attack, hold and release parameters to our little JSFX macro.
Wiggle the corresponding fader in ReaGate, select Param – at the top of the FX window (next to the presets and FX channel configuration) – and select Parameter modulation/MIDI link.
A visualization for the threshold parameter:
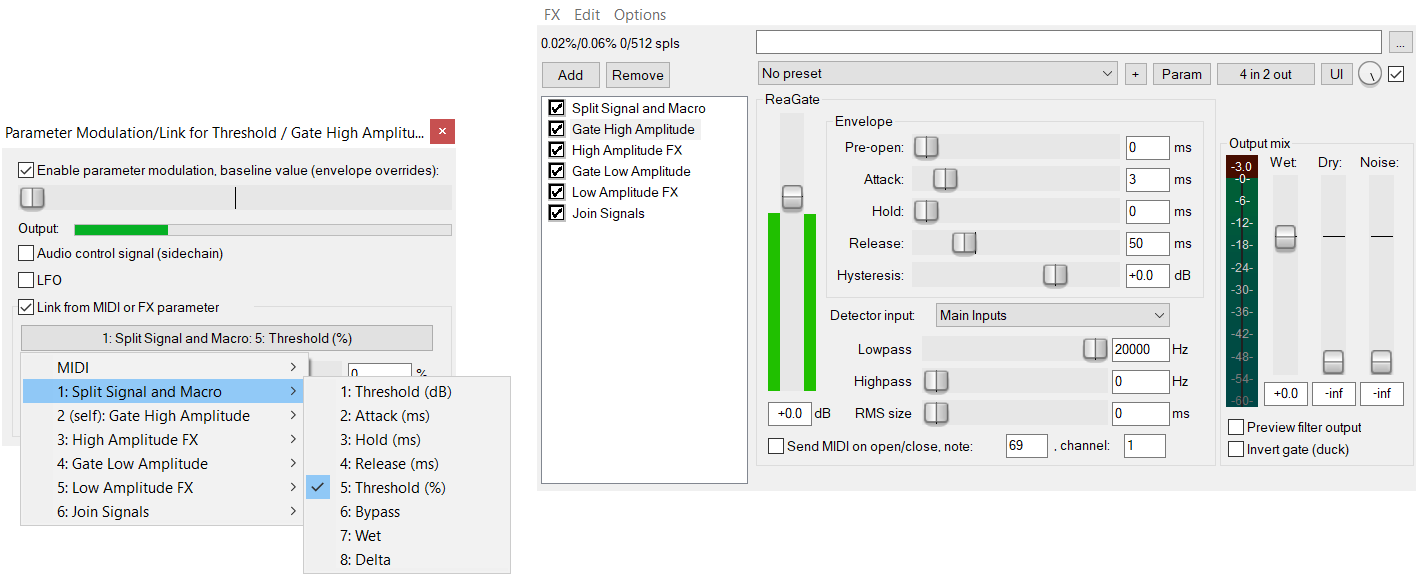
Parameter modulation setup
With this, the JSFX macro controls the parameter of both ReaGate instances at the same time. It might be useful to double click one instance to show it, while setting the threshold. Otherwise we are missing some visual feedback on where to set the levels.
By the way, we have to use the helper variable Threshold (%), which maps the threshold fader range of the ReaGate instance to a percentage, which is the unit used for the parameter modulation.
Otherwise, the threshold fader of our JSFX macro would not map correctly to the -60dB ot +12dB range of ReaGate.
Remember to set up the parameter modulation for each of the parameters in both ReaGate instances!
The second ReaGate instance will be exactly the same, just with the Invert gate (duck) option at the bottom right enabled:
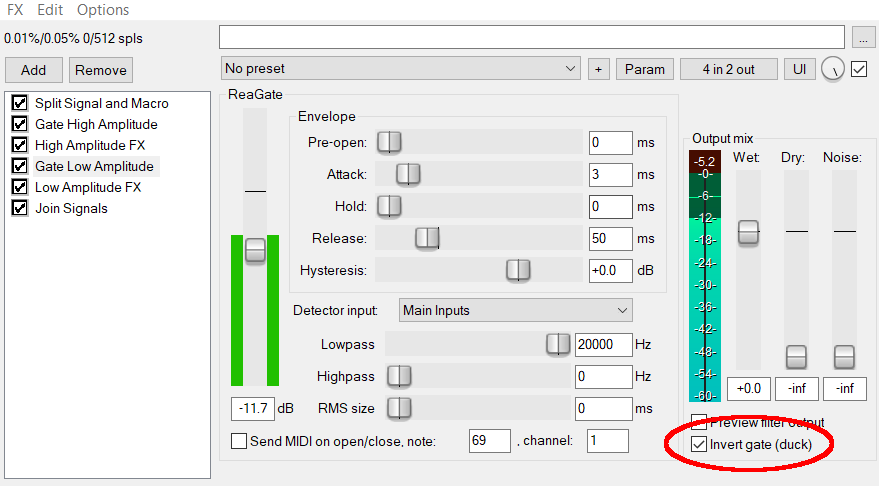
Low amplitude ReaGate configuration
The first gate is open to any signal above the threshold, and the second gate is open to any signal below the threshold.
Track Channel Routing
We need at least two pairs of stereo channels, s go to the tracks routing options and set Track channels: 4.
The FX in our chain will have the following channel setup:
- Amplitude Split Macro: 1/2 (in), 1/2 + 3/4 (out)
- High amplitude ReaGate and corresponding FX container: 1/2 (in), 1/2 (out)
- Low amplitude ReaGate and corresponding FX container: 3/4 (in), 3/4 (out)
- 2 Band joiner: 1/2 + 3/4 (in), 1/2 (out)
Here is an example for the low amplitude FX container:
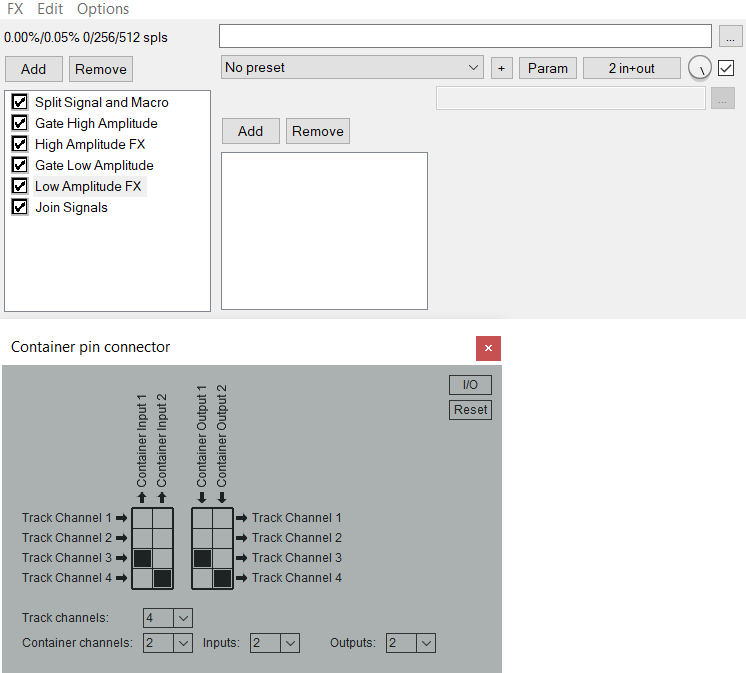
Low amplitude channels
“But does it null?”
as the great Dan Worrall likes to ask.
Yes it does:
Does It Null?
It nulls in any configuration, since we are configuring both ReaGate instances in exactly the same way! Attack, hold, and release times serve as a kind of cross fade between the high and low amplitude sections. This is exactly where it gets interesting, because you can fine tune the transient shaper characteristics here.
It does glitch though, if you set attack, hold, and release to 0ms, so you might want to stay above that range.
Sound examples
Okay, we have it set up.
Let’s take it for a ride.
Here is a sweet little drum loop, we’ll use to evaluate the setup:
Maybe, we can populate the high amplitude FX container with a preamp emulation, for some sweet saturation, and some wave shaping to compress/clip the signal a bit:
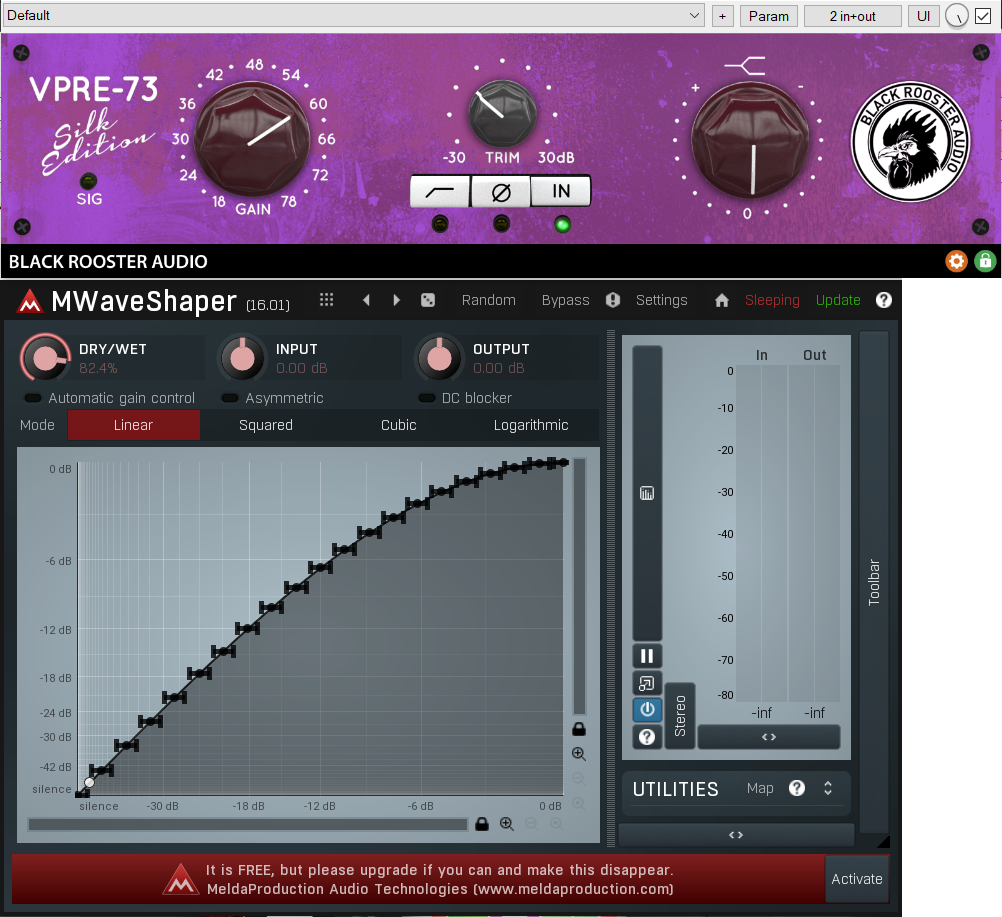
High Amplitude FX
We can use the 2 band joiner at the end of the chain to mute the second signal and only listen to the high amplitude part.
This is what it sounds like on its own:
The sustained part could use some reverb:
Now blending both together:
We can use the 2 band joiner to mix them, e.g. -7 dB on the sustained part:
And we can change the characteristics in our split macro JSFX:
- Lower threshold, putting more signal into the high amplitude section:
- Slower attack, keeping the beginning of transients in the low amplitude section:
- Slow release, staying in the high amplitude mode for longer:
Now, is this useful?